 DEVELOPING COLOR

LUT install guide
How to Install LUTsPack by Pack, App by App.
Download from your order, unzip, pick the LUT that matches your footage, then follow the steps for the app you edit in.
Start here
Get Your Files
After you buy, download your pack from the link in your order email, or open your order page and download again. You do not need a third-party account. Apps need the .cube files inside the .zip, so unzip it first.
Mac
Double-click the .zip in Downloads. A folder with the .cube files appears next to it.
Windows
Right-click the .zip and choose Extract All, then click Extract.
iPhone & iPad
Open the download in Safari. In the Files app, go to Downloads and tap the .zip to unzip it. Keep the .cube files in On My iPhone / On My iPad so apps can find them.
Android
Open the .zip in your files app, for example Files by Google, and tap Extract.
Editing on your phone but downloaded on a computer? AirDrop or copy the unzipped folder to your phone. Keep the files you bought for yourself; they are licensed to you and cannot be shared.
Pack 01
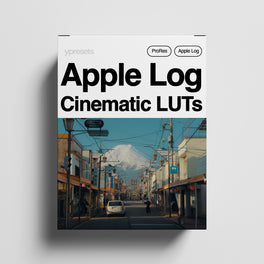
iPhone Apple Log LUTs
For Apple Log and Apple Log 2 on iPhone 15 Pro, 16 Pro, 17 Pro and 18 Pro (and Pro Max). The same LUTs work on both profiles. There is no separate Apple Log 2 set.
This pack
iPhone Apple Log LUTs
- Shoot in Apple Log (or Apple Log 2) in the Camera app or Blackmagic Cam
- Apply an Apple Log LUT straight onto the flat clip. It already includes the Rec. 709 conversion
- Standard Camera-app video needs the iPhone Cinematic LUTs instead
Next
Install, then watch
Download your files from your order email or order page, unzip them, then follow the app steps below. Short tutorials for applying this pack live on the Using Your LUTs page.
No extra conversion needed. Every Ypresets LUT already includes the Rec. 709 conversion. Apply it straight onto matching footage.
Pack 02
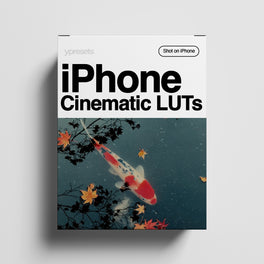
iPhone Cinematic LUTs
For standard, colorful iPhone video from the Camera app on any iPhone, including a Pro that was not set to Log.
This pack
iPhone Cinematic LUTs
- Use these on normal Rec. 709 iPhone clips, not on Apple Log
- On Log footage they look too contrasty. Switch to the Apple Log pack for Log
- Works in the same desktop and phone editors as the other packs
Next
Install, then watch
Download your files from your order email or order page, unzip them, then follow the app steps below. Short tutorials for applying this pack live on the Using Your LUTs page.
No extra conversion needed. Every Ypresets LUT already includes the Rec. 709 conversion. Apply it straight onto matching footage.
Pack 03
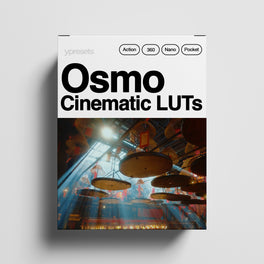
Osmo Cinematic LUTs
For DJI Osmo Pocket, Action and related cameras. Pick D-Log or D-Log M to match the profile you shot.
This pack
Osmo Cinematic LUTs
- D-Log M LUTs: Osmo Pocket 3, Osmo Nano, Osmo 360, Action 4, Action 5 Pro and Action 6
- D-Log LUTs: Osmo Pocket 4 and Osmo Pocket 4P
- D-Log 2 on Pocket 4P: use the D-Log LUTs. There is no separate D-Log 2 set
Next
Install, then watch
Download your files from your order email or order page, unzip them, then follow the app steps below. Short tutorials for applying this pack live on the Using Your LUTs page.
No extra conversion needed. Every Ypresets LUT already includes the Rec. 709 conversion. Apply it straight onto matching footage.
Pack 04
Drone Cinematic D-Log & D-Log M LUTs
For DJI drone D-Log and D-Log M. Match the folder to the color mode on the clip.

This pack
Drone Cinematic D-Log & D-Log M LUTs
- D-Log LUTs: Mavic 3, Mavic 3 Classic, Mavic 3 Pro, Mavic 3 Cine, Mavic 4 Pro and Inspire 3
- D-Log M LUTs: Mini 4 Pro, Mini 5 Pro, Air 3, Air 3S and Avata 2
- Some drones can record both. Check the color mode you used before you pick a LUT
Next
Install, then watch
Download your files from your order email or order page, unzip them, then follow the app steps below. Short tutorials for applying this pack live on the Using Your LUTs page.
No extra conversion needed. Every Ypresets LUT already includes the Rec. 709 conversion. Apply it straight onto matching footage.
Presets
Lightroom Presets
Photo presets have their own install guide. Video LUT steps on this page do not apply to Lightroom.
Install guide
Lightroom preset install
Download, unzip, and import .xmp presets in Lightroom Mobile, Lightroom on desktop, and Lightroom Classic.
Tutorials
Using your presets
Short videos for applying presets and fine-tuning the look in Lightroom.
Apps
Pick Your App
Ypresets LUTs are standard .cube files. Pick the app you edit in to jump to its steps.
Computer
Computer · Mac & Windows
DaVinci Resolve
Works the same in DaVinci Resolve (free) and DaVinci Resolve Studio. Install the LUTs once and they're there in every project.
Install the LUTs
- Open a project, then open Project Settings with the gear icon at the bottom right (or choose File → Project Settings).
- Go to Color Management and, under Lookup Tables, click Open LUT Folder.
- Copy your unzipped Ypresets folder into the folder that opens. Keeping the folder together makes your LUTs easy to find.
- Back in Project Settings, click Update Lists, then Save.
Apply a LUT on a node
- Go to the Color page and select your clip.
- Add a new serial node with Option-S on Mac or Alt-S on Windows.
- Click LUTs at the top left to open the LUT Browser, open your Ypresets folder and drag a LUT onto the new node. You can also right-click the node and pick the LUT from the LUT menu.
- Set exposure and white balance in a node before the LUT node, so the LUT gets a clean image.
Intensity: select the LUT node, open the Key palette and lower Key Output Gain (1.00 is full strength).
Color managed project? If Color Science is set to DaVinci YRGB Color Managed, right-click the clip and choose Bypass Color Management, or the footage gets converted twice. Our LUTs already include the conversion.
Copying files by hand? The LUT folder is /Library/Application Support/Blackmagic Design/DaVinci Resolve/LUT on Mac and C:\ProgramData\Blackmagic Design\DaVinci Resolve\Support\LUT on Windows. The Mac App Store version uses a different folder, so Open LUT Folder is the safest route.
Computer · Mac & Windows
Premiere Pro
Use the Lumetri Color panel. Adobe now calls the app Premiere; the steps are the same.
Apply a LUT
- Choose Window → Lumetri Color and select your clip in the Timeline.
- Open the Creative section, click the Look menu and choose Browse.
- Select the .cube file and click Open. The look appears on your clip.
- Use the Intensity slider under Look to set the strength.
Keep LUTs in the Look menu (optional)
- Mac: in Finder choose Go → Go to Folder and enter
~/Library/Application Support/Adobe/Common/LUTs. Windows: openC:\Users\<your name>\AppData\Roaming\Adobe\Common\LUTs. - Create a folder named Creative there if it isn't already, and copy your .cube files into it.
- Restart Premiere. Your LUTs now appear in Lumetri Color → Creative → Look.
Log clip looks normal before you add the LUT? Premiere can convert log footage automatically. Turn that off for the clip in Lumetri Color → Settings → Source Clip by switching on Preserve RGB, then apply the LUT. Otherwise the image is converted twice.
Many clips: choose File → New → Adjustment Layer, place it above your clips and add the LUT to the adjustment layer.
Computer · Mac
Final Cut Pro
Use the built-in Custom LUT effect.
Apply a LUT
- Select the clip in the timeline.
- Log clip? In the Info inspector (choose the Settings metadata view at the bottom), set Camera LUT to None. Final Cut converts log footage on its own, and our LUTs already do that.
- Open the Effects browser (Command-5), select the Color category and double-click Custom LUT.
- In the Video inspector, open the Custom LUT section's LUT menu and choose Choose Custom LUT.
- Select a .cube file, or the whole unzipped folder, and click Open. A folder shows up as a submenu in the LUT menu.
- Leave Input and Output on Rec. 709 in a standard Rec. 709 library.
Intensity: lower the Mix slider in the Custom LUT section.
Many clips: copy the graded clip, select the others and choose Edit → Paste Effects.
Computer · Mac & Windows
After Effects
Put the LUT on an adjustment layer so it covers everything below it.
Apply a LUT
- Choose Layer → New → Adjustment Layer and place it above your footage.
- With the adjustment layer selected, choose Effect → Utility → Apply Color LUT.
- Select the .cube file when After Effects asks for it.
- Lower the adjustment layer's Opacity to set the strength.
Prefer an Intensity slider? Use Effect → Color Correction → Lumetri Color, then Creative → Look → Browse, and adjust Intensity.
Computer · Mac & Windows
CapCut desktop
The desktop app imports .cube LUTs. The phone app can't, see below.
Apply a LUT
- Create a project, import your video and drag it to the timeline.
- Open the Adjustment tab at the top left and select LUT.
- Click Import and choose your .cube files.
- Drag a LUT onto the timeline above your clips to add it as an adjustment layer, then stretch it over the clips. You can also apply it to a single clip.
- Set the strength with the Intensity slider in the LUT settings on the right.
Computer · Mac & Windows
Photoshop
Handy for thumbnails and frame grabs. Photoshop also opens video files as video layers.
Apply a LUT
- Open your image or video. The document needs to be in RGB mode.
- Choose Layer → New Adjustment Layer → Color Lookup and click OK.
- In the Properties panel, open the 3DLUT File menu, choose Load 3D LUT and select the .cube file.
- Lower the adjustment layer's Opacity to set the strength.
iPad
DaVinci Resolve for iPad
Copy the LUTs into Resolve's folder in the Files app, then refresh the list.
Install the LUTs
- In the Files app, tap the .zip to unzip it.
- Press and hold the unzipped folder and tap Copy.
- Go to On My iPad → DaVinci Resolve → LUT, press and hold an empty space and tap Paste. Open Resolve once first if you don't see its folder.
- In DaVinci Resolve, open Project Settings with the gear icon, go to Color Management and tap Update Lists.
Apply a LUT
- Go to the Color page and add a node to your clip.
- Tap LUTs to open the LUT Browser, open your Ypresets folder and drag a LUT onto the node.
Intensity: the same as on desktop, with Key Output Gain in the Key palette.
iPad · iPhone · Android
LumaFusion
Imported LUTs stay in LumaFusion for every project.
Apply a LUT
- Save the unzipped .cube files to your device (on iPhone and iPad, the Files app).
- Double-tap a clip in the timeline to open the editor.
- Open the Color & Effects tab, go to the LUT presets and tap Import.
- Find your .cube file, select it and tap Open.
- Tap the LUT to apply it, then use the Blend slider to set the strength.
LUT grayed out on iPhone or iPad? In the Files app, press and hold the file, tap Share and send it to LumaFusion. If LumaFusion isn't listed, tap Edit (or More) at the end of the app row and add it.
Phone · iPhone
VN
VN imports .cube files as filters.
Apply a LUT
- Save the unzipped .cube files to the Files app.
- In your project, select a clip and tap Filter.
- Tap Filter → Add and choose the Files app.
- Select the .cube file and choose the filter category to keep it in.
- Apply it from the Filter panel, then adjust the intensity.
You can also import from the Filter Library: My Filters → Import Filter.
Phone · iPhone & Android
Blackmagic Cam
A free camera app. Use a LUT to see the finished look while you shoot Apple Log, and keep the clean log file for editing.
Load a LUT for preview
- Save the unzipped .cube files to your phone.
- Open Blackmagic Cam, tap Settings and open the LUTs tab.
- Under LUT Selection, tap Import LUT, choose the file, then select it from the list.
- Turn on Display LUT to see the look on screen. The recorded clip stays flat log.
- Turn on Record LUT to Clip only if you want the look recorded into the file.
On an iPhone 15 Pro or later, set Color Space to Apple Log in the record settings and use the iPhone Apple Log LUTs. Leave the LUT's Color Space Tag on Rec. 709.
Blackmagic Cam is a camera, not an editor. To grade clips you've already shot, use one of the editors on this page.
Good to know
Apps That Can't Import LUTs
These apps don't load custom .cube files, so there's no way to add our LUTs to them.
Phone
CapCut mobile
The CapCut phone app only has its built-in filters. Use CapCut desktop, or edit on your phone with VN or LumaFusion.
iPad
Final Cut Pro for iPad
Apple doesn't support custom LUTs in the iPad version. Use DaVinci Resolve for iPad or LumaFusion, or Final Cut Pro on a Mac.
Fine-tune
Intensity and Finishing Tips
Each look is built to work at full strength. Every scene is different, so it's normal to dial it back a little or touch up exposure afterward.
01
Expose first
Fix exposure and white balance before the LUT. In Resolve, do it in a node before the LUT node.
02
Then dial it in
Start at full strength, then pull back until skin tones and skies look natural.
03
Keep it consistent
Use the same LUT and strength across a scene. An adjustment layer is the quickest way.
Where the strength control is
- DaVinci ResolveKey palette → Key Output Gain on the LUT node
- Premiere ProLumetri Color → Creative → Intensity
- Final Cut ProCustom LUT → Mix
- After EffectsAdjustment layer Opacity, or Lumetri Intensity
- CapCut desktopIntensity slider in the LUT settings
- PhotoshopColor Lookup layer Opacity
- LumaFusionBlend slider
- VNFilter intensity slider
Help
Troubleshooting
My LUT doesn't show up in DaVinci Resolve.
Make sure you copied the unzipped .cube files, not the .zip, into the folder that Open LUT Folder opens. Then click Update Lists in Project Settings → Color Management, or restart Resolve.
The picture looks too contrasty, dark or oversaturated.
The footage is probably being converted twice. Our LUTs already include the Rec. 709 conversion, so don't add another one first. Turn off the app's own log conversion for that clip: Bypass Color Management in Resolve, Preserve RGB in Premiere, or set Camera LUT to None in Final Cut Pro.
Also check the LUT matches the footage. The iPhone Cinematic LUTs on Apple Log, or a Log LUT on normal video, will look wrong.
The picture still looks flat and washed out.
Check you used the set for the profile you shot. D-Log M and D-Log are different, so a D-Log M clip needs a D-Log M LUT. Also check the LUT is switched on and its intensity isn't turned down.
Do I need to convert to Rec. 709 before I apply the LUT?
No. Every Ypresets LUT already includes the Rec. 709 conversion. Apply it straight onto your log footage.
Can I import the .zip file straight into my app?
Unzip it first. Most apps import .cube files, not the .zip they come in.
Can I use the LUTs in CapCut on my phone?
Not in the CapCut phone app, because it can't import .cube files. Use CapCut desktop, or a phone editor that can, like VN or LumaFusion.
Do the LUTs work in Final Cut Pro for iPad?
No. Final Cut Pro for iPad doesn't support custom LUTs. Use DaVinci Resolve for iPad or LumaFusion on iPad instead.
My .cube files are grayed out on my iPhone or iPad.
In the Files app, press and hold the file, tap Share and send it to your editing app. This often fixes files that another app has claimed.
Where do I find my download again?
Your files arrive by email, and you can download them again any time at account.ypresets.com with the email you used at checkout. Still missing? Email hi@ypresets.com.
I'm still stuck. How do I get help?
Email hi@ypresets.com. Tell us the app and version you're using, your camera and the profile you shot, and we'll help you get it working.
Ypresets video LUTs
Got the Footage?Get the Look.
LUTs for iPhone Apple Log, everyday iPhone video, DJI Osmo and DJI drones.